Google Search Console MCP with Claude: Automate Weekly SEO Reports
Diesen Artikel auf Deutsch lesen
Start here: Pythia is the complete, tested code for an automated weekly Google Search Console report.
Get Pythia on GitHub
Looking for a Google Search Console MCP for Claude? This tutorial compares an OAuth-consent MCP with a service account and shows how to turn Search Console data into a clear weekly SEO report automatically. A Google service account is the cleaner way to connect your own scripts or Claude Code to the Google Search Console API: no consent screen, no third-party software sitting between you and your own data, and access can be revoked at any time directly in Search Console.
It took me a few hours to figure this out, because most tutorials online default to exactly those third-party wrappers and never mention the official service-account route at all.
The setup itself is, once done, unremarkable: create a Google Cloud project, enable the Search Console API, create a service account, store its JSON key safely, and add the service account as a restricted, read-only user in Search Console.
After that, any Python script or Claude Code run can query performance data normally, with no browser consent window ever popping up — exactly the foundation an AI needs to not just pull the numbers, but actually interpret them. As a bonus, I'll show how a systemd user timer, instead of a classic cron job, automatically catches up on missed runs if the machine was off.
The complete, tested code is also available as a standalone repo: Pythia.
Service Account vs. OAuth-Consent MCP
Why bother with your own service account when ready-made MCP servers exist for the Search Console API? Technically, both approaches use OAuth 2.0 — the real difference is whether a human has to approve access in a browser once, and whether third-party server code sits in between.
| OAuth-Consent MCP (third-party) | Service Account | |
|---|---|---|
| Setup effort | Low, a few clicks | A bit more (GCP project, service account, key) |
| Runs through a hosted third-party server | Usually yes | No |
| Requires one-time interactive browser consent | Yes, on first login | Never |
| Suitable for unattended automation (cron/timer) | Possible with a securely stored refresh token | Yes, no consent step at all |
| Access revocable at a granular level | Via third-party settings | Directly in Search Console |
For a one-off, interactive query, an OAuth-consent MCP is plenty — recurring runs work too, in principle, if you take care of a securely stored refresh token. A service account takes exactly that burden off your hands: no token handling, no third-party server, no consent step that could get in the way.
Before you start
- A Google Cloud account (free)
- A property in Google Search Console you have access to
- Python 3 with
venv - 15-20 minutes for the one-time setup
Setup
1. Create a Google Cloud project and enable the Search Console API
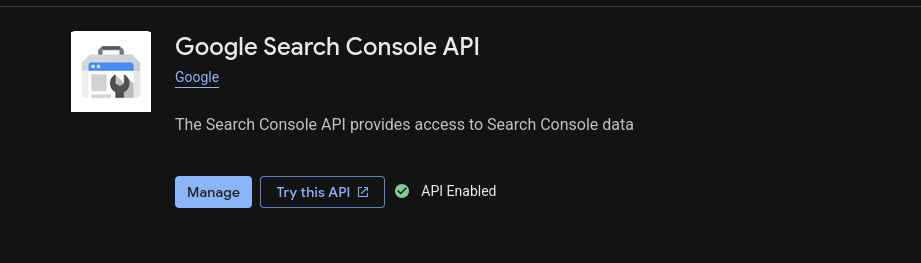
In the Google Cloud Console, create a new project (e.g. <project>-search-console), then under "APIs & Services" → "Library" search for "Google Search Console API" and enable it.
Gotcha: Google Cloud remembers the last active project. It's easy to accidentally end up in the wrong (e.g. an older) project — always check the project selector at the top before enabling anything.
2. Create a service account
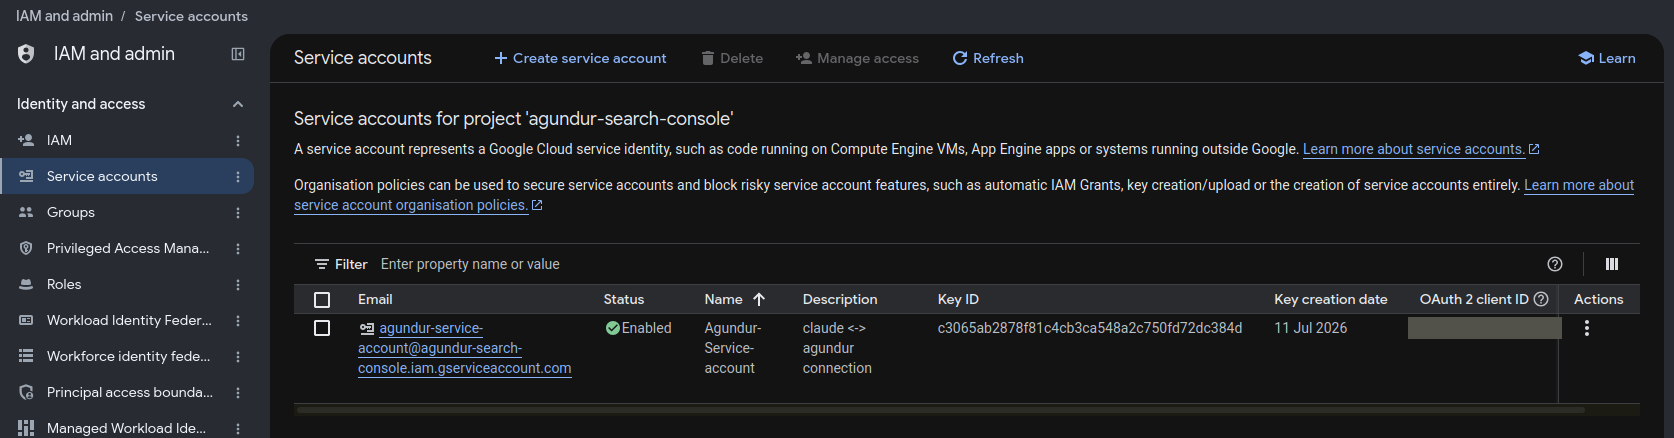
In the Google Cloud Console's left menu, click "IAM and admin" — this opens a submenu, select "Service Accounts" there. Then "Create Service Account", give it a name, done — deliberately skip the optional "Grant this service account access to project" and "Grant users access to this service account" steps, we don't need them for our purpose.
Gotcha: The browser back button during this wizard tends to create duplicate service accounts. Better to start fresh from "Create Service Account" than navigate back.
3. Create a JSON key and store it securely
In the service account you created → "Keys" tab → "Add Key" → "Create new key" → JSON.
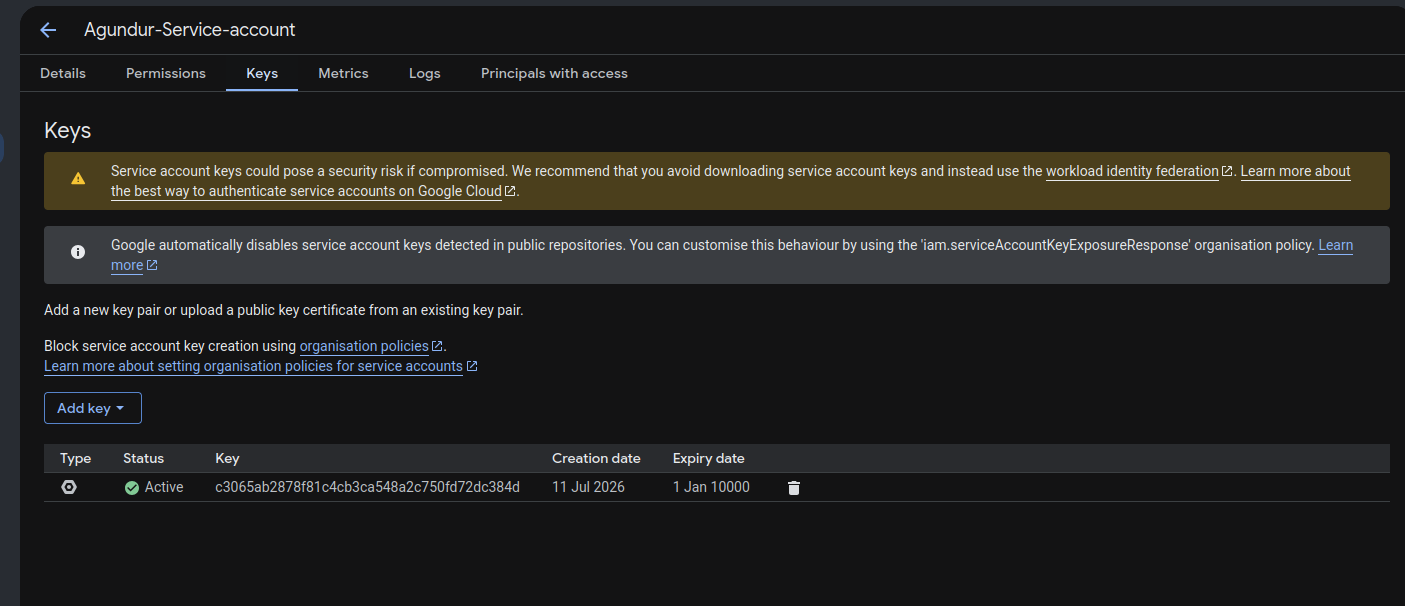
Google itself warns right here that service account keys are a security risk — and the expiry date above shows why: JSON keys don't expire by default. Without an explicit Google Cloud organization policy enforcing an expiry, a key like this stays valid indefinitely. If you use the approach in this article, make a recurring habit of it: actively delete keys you no longer use in the "Keys" tab instead of leaving them lying around.

Never put the downloaded file into a Git repo. Instead, e.g.:
mkdir -p ~/.config/<project>
mv ~/Downloads/<project>-xxxxx.json ~/.config/<project>/service-account.json
chmod 600 ~/.config/<project>/service-account.json
If the key ever needs to live near a Git repo (e.g. because a script expects it in the same folder): symlink it in rather than copying it. A .gitignore entry protects a symlink the same way it protects a real file — but even in the worst case of a forced git add -f, Git stores a symlink as just the target path as text, never the actual file content. An accidental force-add would at most leak a local path, not the key itself. That's exactly how it's handled in the Pythia repo.
4. Add the service account in Search Console
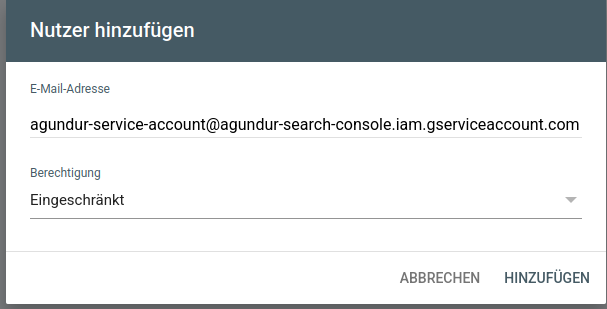
In Search Console for the property you want → "Settings" → "Users and permissions" → "Add user". Enter the service account's email address (ends in @<project>.iam.gserviceaccount.com); "Restricted" (read-only) permission is plenty for analysis.
Gotcha: Domain property vs. URL-prefix property. A Domain property (sc-domain:example.com) automatically aggregates all subdomains — if you have, say, a separate hobby/side project on a subdomain, its data ends up mixed into the same report. For clean reporting, create a dedicated URL-prefix property for exactly the property you want to analyze.
First query
Set up the Python environment:
python3 -m venv ~/.config/<project>/venv
~/.config/<project>/venv/bin/pip install google-auth google-api-python-client
The script expects service-account.json in the same folder as itself — so put both together in ~/.config/<project>/. Here's the full, tested code as a link rather than something to retype (indentation reliably breaks when copy-pasting from a web page):
It validates input (invalid days/limits/dimensions) and catches the most common failure cases with a clear message instead of a raw Python traceback: missing dependencies, a missing key, 403 for a wrong or non-existent property permission, 400 for invalid property syntax.
Run it (from inside the ~/.config/<project>/ folder, or with the full path to query.py):
~/.config/<project>/venv/bin/python ~/.config/<project>/query.py "https://www.example.com/" --days 7 --dimensions page --limit 25No browser window, no consent dialog — authentication runs entirely through the service account key.
Why not just look in Search Console?
Fair question at this point: the numbers are already sitting right there in the browser, so why the whole API effort? If it were only about looking at the numbers — fair enough, no reason at all.
The point is what happens behind the API once you hook it up to Claude Code instead of a dashboard. In 2026, you no longer need to click through the same tables every week yourself and compare them to last week in your head — an LLM can take that over, and not just as a number filter, but as an analysis tool that actually makes sense of the numbers: what changed since last week, which page is suddenly losing clicks despite a good position, where a look at the title and meta description is worthwhile because the search terms no longer match the text. The result isn't a data export, it's a ready-made, contextualized report with concrete action items — exactly what the prompt in the linked weekly-report.sh does.
Recurring check: systemd user timer instead of cron
For a weekly report, a systemd user timer beats a classic cron job because it automatically catches up on missed runs (Persistent=true) — handy for when the machine happened to be off or asleep at the scheduled time, which is more common on a regular desktop/laptop than on a server.
The script and both unit files, ready to clone and commented on exactly where SITE_URL and the path to weekly-report.sh need to go:
Copy to ~/.config/systemd/user/ and enable:
systemctl --user daemon-reload
systemctl --user enable --now search-console-weekly.timer
Check with systemctl --user list-timers when the next run is due.
A gotcha I ran into myself while putting the public code together: the first version of the script hardcoded the path to itself and to the venv (~/.config/google-search-console/...). Works fine locally, but breaks immediately the moment someone else clones the repo somewhere else. The more robust fix: the script determines its own directory at runtime (dirname "$(readlink -f "$0")") and builds all paths relative to that. No problem if you're only ever writing for yourself — becomes an instant bug the moment the code is meant to be shared. That's exactly what's already built into the three files above.
Troubleshooting
- PERMISSION_DENIED on query: the service account wasn't added (or was added with the wrong email) as a user on the Search Console property — check step 4.
- Wrong/empty data: check the property type — a Domain property aggregates subdomains, a URL-prefix property doesn't. You may be querying the wrong property.
- API not enabled: the error message usually names the Google Cloud project directly — check whether that's actually the project where you enabled the Search Console API (see the gotcha above).
- Timer not running: check
systemctl --user status search-console-weekly.timerandjournalctl --user -u search-console-weekly.service. On some distros, "lingering" needs to be enabled (loginctl enable-linger $USER) for user timers to run without an active login session.
Conclusion
For a one-off, interactive query, a ready-made OAuth-consent MCP server is the faster choice. But once a script needs to run regularly and unattended — daily, weekly, on a timer instead of triggered by hand — the service-account route is the more robust one: no consent dialog that could suddenly show up mid-run, and access stays directly controllable in Search Console at all times.
The API only delivers the data; the practical value comes from the automated report that makes sense of the changes and turns them into concrete next steps.
The complete code from this article — query.py with error handling, weekly-report.sh, both systemd units, a beginner-friendly README — is ready to clone at github.com/Agundur-KDE/Pythia.
If Pythia saves you time, you can support continued maintenance through GitHub Sponsors.
← Back to Projects


